Built with Inline Studio
Building an AI football music video with Kilng 3 & LTX 2.3
Learn how to create a cinematic AI-generated football music video from start to finish.
- GPT 2 Image Generation
- Kling 3
- LTX 2.3 Image + Audio to Video
- Premiere Pro
Building an AI Music Video with GPT Image Generation, Kling 3, and LTX 2.3
A step-by-step tutorial for creating a cinematic football-themed music video from storyboard to final edit using GPT Image Generation, Kling 3, LTX 2.3, and Premiere Pro.
Overview
This tutorial walks through creating a cinematic football-themed music video entirely with AI tools. Instead of relying on a single video generation model, different models were used based on their strengths.
The workflow follows these stages:
- Generate a storyboard to plan every scene.
- Create character and environment reference sheets for visual consistency.
- Generate and animate each shot using GPT Image Generation, Kling 3, and LTX 2.3.
- Combine and synchronize all clips inside Premiere Pro.
What You Need
- GPT Image Generation
- Kling 3 Image to Video
- LTX 2.3 Image + Audio to Video
- Premiere Pro (or any video editor)
- Inline Studio workflows
The Pipeline at a Glance
Idea
    ↓
Storyboard
    ↓
Character Sheets
(Player • Singer • Stadium)
    ↓
Generate Final Images
    ↓
Animate Football Scenes (Kling 3)
    ↓
Animate Singer Scenes (LTX 2.3)
    ↓
Final Edit & Audio Sync
Each shot follows the same workflow:
Storyboard → Generate Final Image → Animate → Final Video Clip
Football Music Video Workflow
Step 1: Storyboard Generation
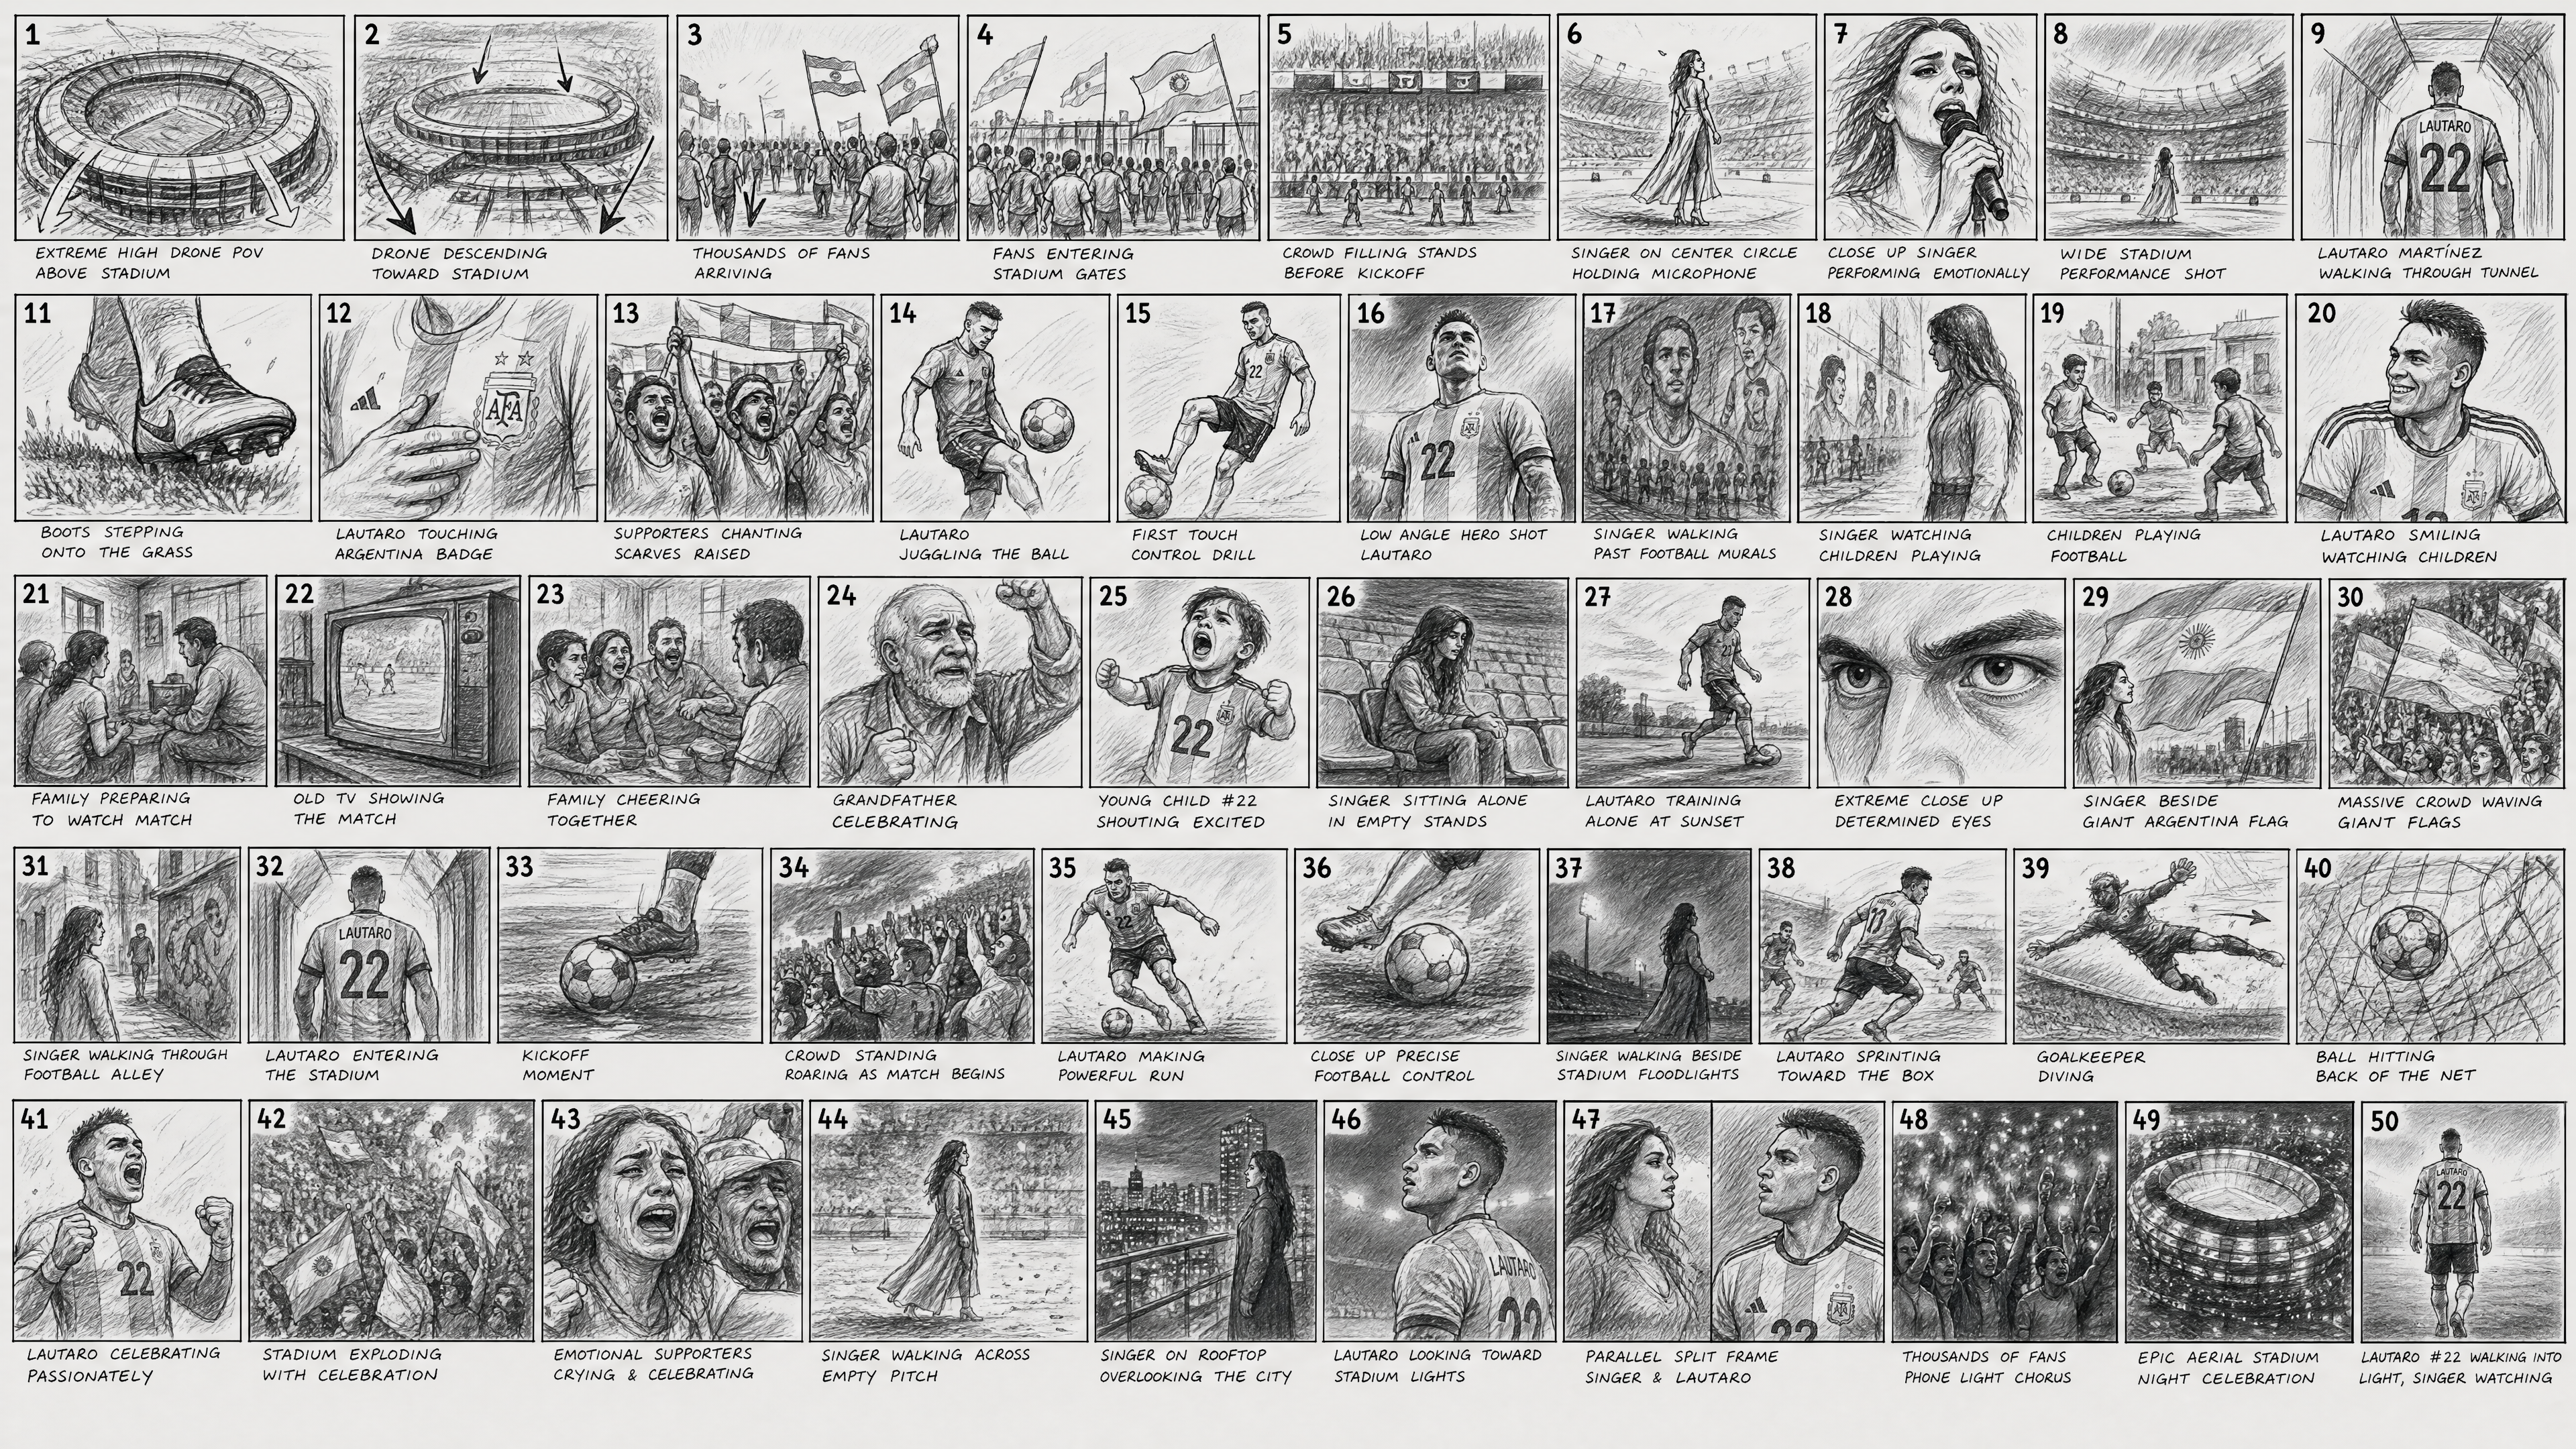
Every project begins with a storyboard.
Instead of immediately generating images, the entire music video was first planned as rough storyboard sketches. This established the pacing, framing, camera angles, and transitions before creating any final assets.
The storyboard served as the blueprint for every scene throughout the production process.
Workflows
Included in the project with prompts.
- Storyboard Generation
Step 2: Character & Environment Generation
After the storyboard was finalized, reference sheets were created for every recurring subject in the video.
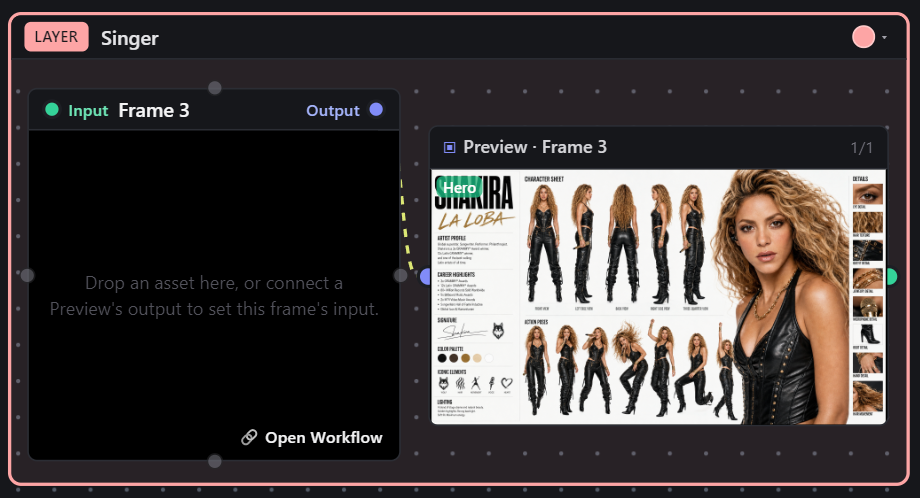
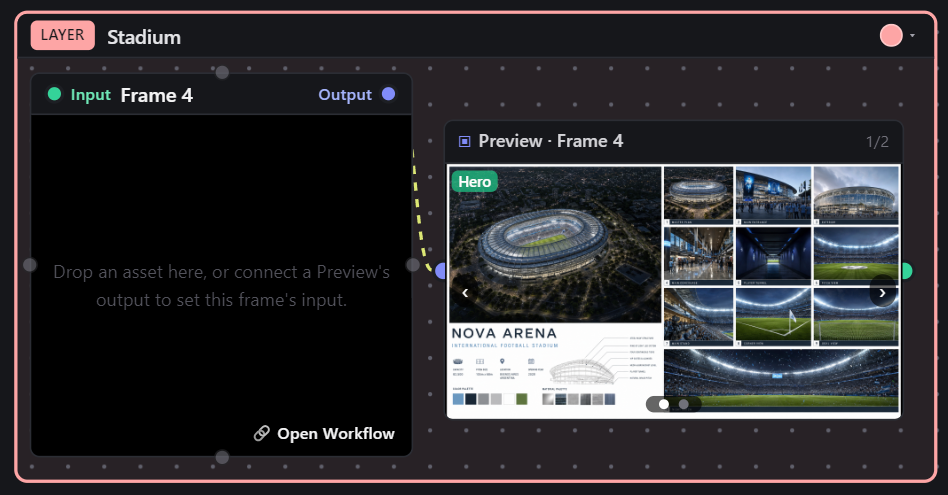
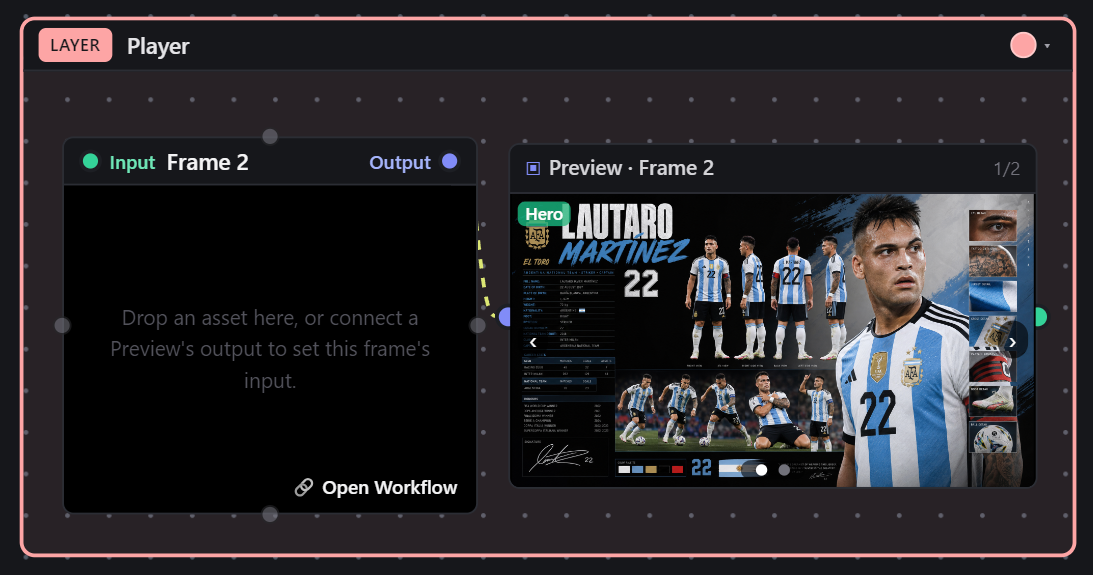
Three separate reference sheets were generated:
- Football Player
- Singer
- Stadium
These reference sheets were reused throughout the project to maintain consistent facial features, clothing, hairstyles, colors, lighting, and environments across every generated shot.
Having dedicated references greatly reduced character drift between scenes and ensured a cohesive visual style throughout the video.
Workflows
Included in the project with all prompts.
- Player Character Sheet
- Singer Character Sheet
- Stadium Reference Sheet
Step 3: Generate & Animate Each Shot
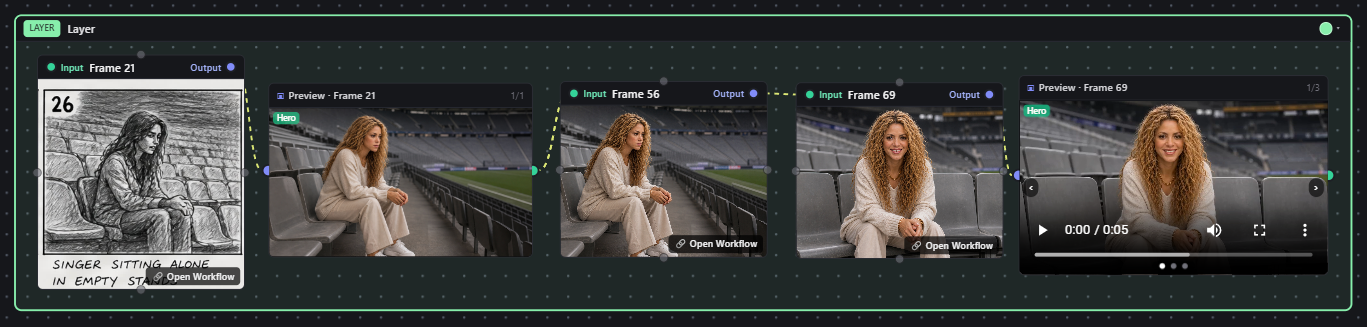
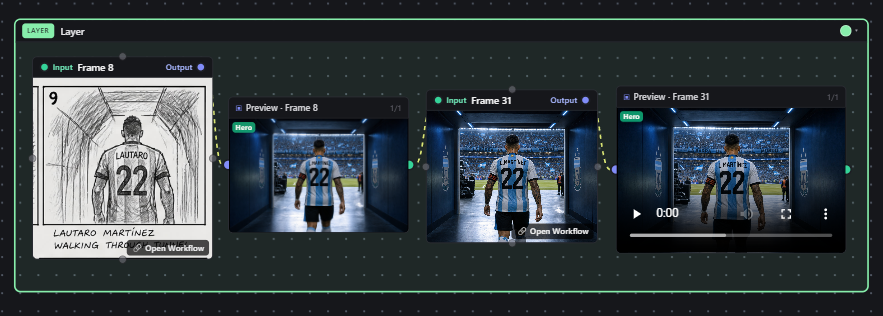
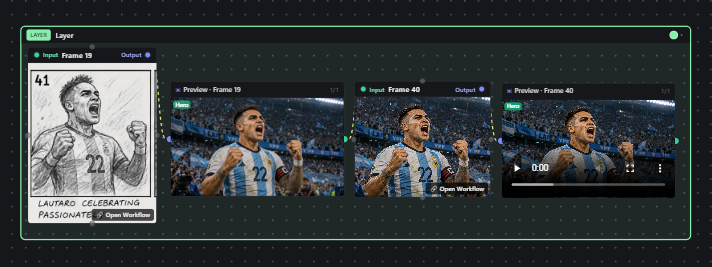
Once the reference sheets were complete, every storyboard panel was processed individually inside a single workflow layer.
Each layer followed the same pipeline:
Storyboard Panel
      ↓
Generate Final Cinematic Image
      ↓
Review & Refine Image
      ↓
Animate the Shot
      ↓
Final Video Clip
Rather than generating all images first and animating them later, each shot was completed from start to finish before moving to the next. This made it easier to review each scene, regenerate specific shots if needed, and maintain visual consistency throughout the project.
Originally, the plan was to animate every shot using a single LTX 2.3 Image + Audio to Video workflow. This workflow required:
- Input image
- Song or audio file
- Prompt
- Audio start time
- Clip duration
After testing the full project, it became clear that one model wasn't ideal for every type of scene.
Kling 3
Kling 3 produced the best results for:
- Football gameplay
- Stadium shots
- Crowd scenes
- Dynamic action
- Fast movement
- Character consistency across multiple shots
LTX 2.3
LTX performed significantly better for:
- Singer performances
- Accurate lip sync
- Natural facial animation
- Eye blinking
- Subtle head movement
- Emotional close-up shots
Because of this, the project used a hybrid workflow.
- Every football, stadium, audience, and action scene was animated using Kling 3 Image to Video.
- Every singer performance was animated using LTX 2.3 Image + Audio to Video to achieve realistic lip sync and facial animation.
Using each model for its strengths resulted in much higher overall quality than using a single workflow for the entire project.
Workflows
Included in the project with all prompts.
- Stadium Shot Generation
- Football Player Shot Generation
- Singer Shot Generation
- Kling 3 Image to Video
- LTX 2.3 Image + Audio to Video
Step 4: Final Editing & Audio Synchronization
Since the project used two separate animation pipelines, the final step was combining everything inside Premiere Pro.
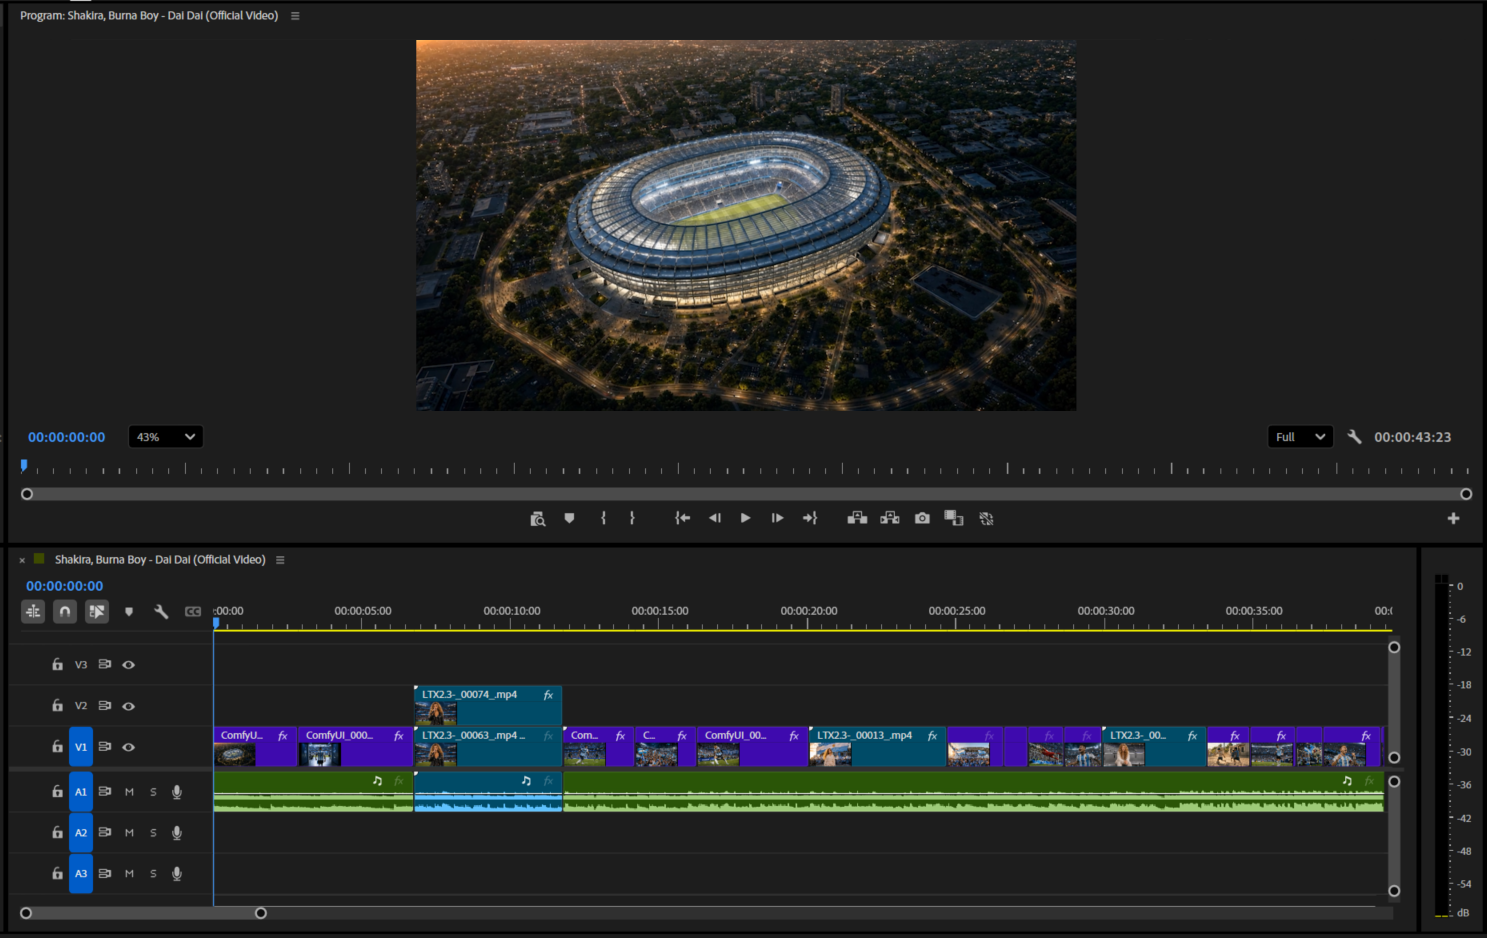
The football clips generated with Kling contained no audio.
The singer clips generated with LTX already included synchronized music and lip sync.
To combine everything seamlessly:
- Import all generated clips into Premiere Pro.
- Arrange the clips according to the storyboard sequence.
- Add the original song as the master audio track.
- Trim the embedded audio from each LTX singer clip so only the lip-sync sections remain.
- Align every singer clip precisely with the master soundtrack.
- Fine-tune the timing, pacing, and transitions until the entire music video plays as one continuous sequence.
This approach ensured perfectly synchronized lip sync while maintaining a single uninterrupted music track throughout the final video.
Workflows Used
- Storyboard Generation
- Player Character Sheet
- Singer Character Sheet
- Stadium Reference Sheet
- Stadium Shot Generation
- Football Player Shot Generation
- Singer Shot Generation
- Kling 3 Image to Video
- LTX 2.3 Image + Audio to Video
- Premiere Pro Timeline Setup
- Audio Synchronization
- Final Edit
Frequently Asked Questions
Why didn't you use Seedance 2.0 for the entire project?
Seedance 2.0 is an excellent image-to-video model and produces impressive cinematic results. However, this project features a real celebrity as the singer. During testing, Seedance frequently returned copyright or safety errors when generating videos involving real celebrities.
To avoid these limitations, I used Kling 3 for the football and cinematic scenes, and LTX 2.3 for the singer performances where reliable lip sync was required.
Why did you choose LTX 2.3 for the singer scenes?
LTX 2.3 offers much more control over audio-driven video generation compared to most image-to-video models.
Some of the features that made it the best choice include:
- Choosing exactly where the audio starts.
- Setting the duration of each generated clip.
- Generating videos directly from an image and audio.
- Accurate lip sync.
- Natural facial animation, blinking, and subtle expressions.
These controls made it much easier to generate multiple singer shots that stayed synchronized with the music.
How did you synchronize the final video with the music?
The football clips generated with Kling contained no audio, while the singer clips generated with LTX already included synchronized music and lip sync.
Inside Premiere Pro, I imported all generated clips, added the original song as the master audio track, and trimmed the embedded audio from the LTX clips so only the required lip-sync sections remained. I then aligned each singer clip precisely with the master soundtrack to create one continuous music video with seamless lip synchronization.
Can I replace Kling 3 or LTX 2.3 with another model?
Absolutely. This workflow is modular.
You can replace Kling 3 or LTX 2.3 with any image-to-video model that better fits your project. The overall pipeline remains the same:
Storyboard → Character Sheets → Final Images → Animation → Final Edit
The only thing that changes is which animation model you choose for each type of scene.
Want the whole project?
Download the full Inline Studio project, prompts, frames, and takes included.