Minimax H3: Pixel art short video lora training locally
This workflow focuses on training Minimax-H3 video lora training. Sample dataset & guide is included.
- minimax-h3
- lora-training
- clip
- video
- training
9 views · 0 downloads · 1 shares
About this workflow
This workflow demonstrates how to train a clip lora for Minimax-H3 with sample pixel art dataset.
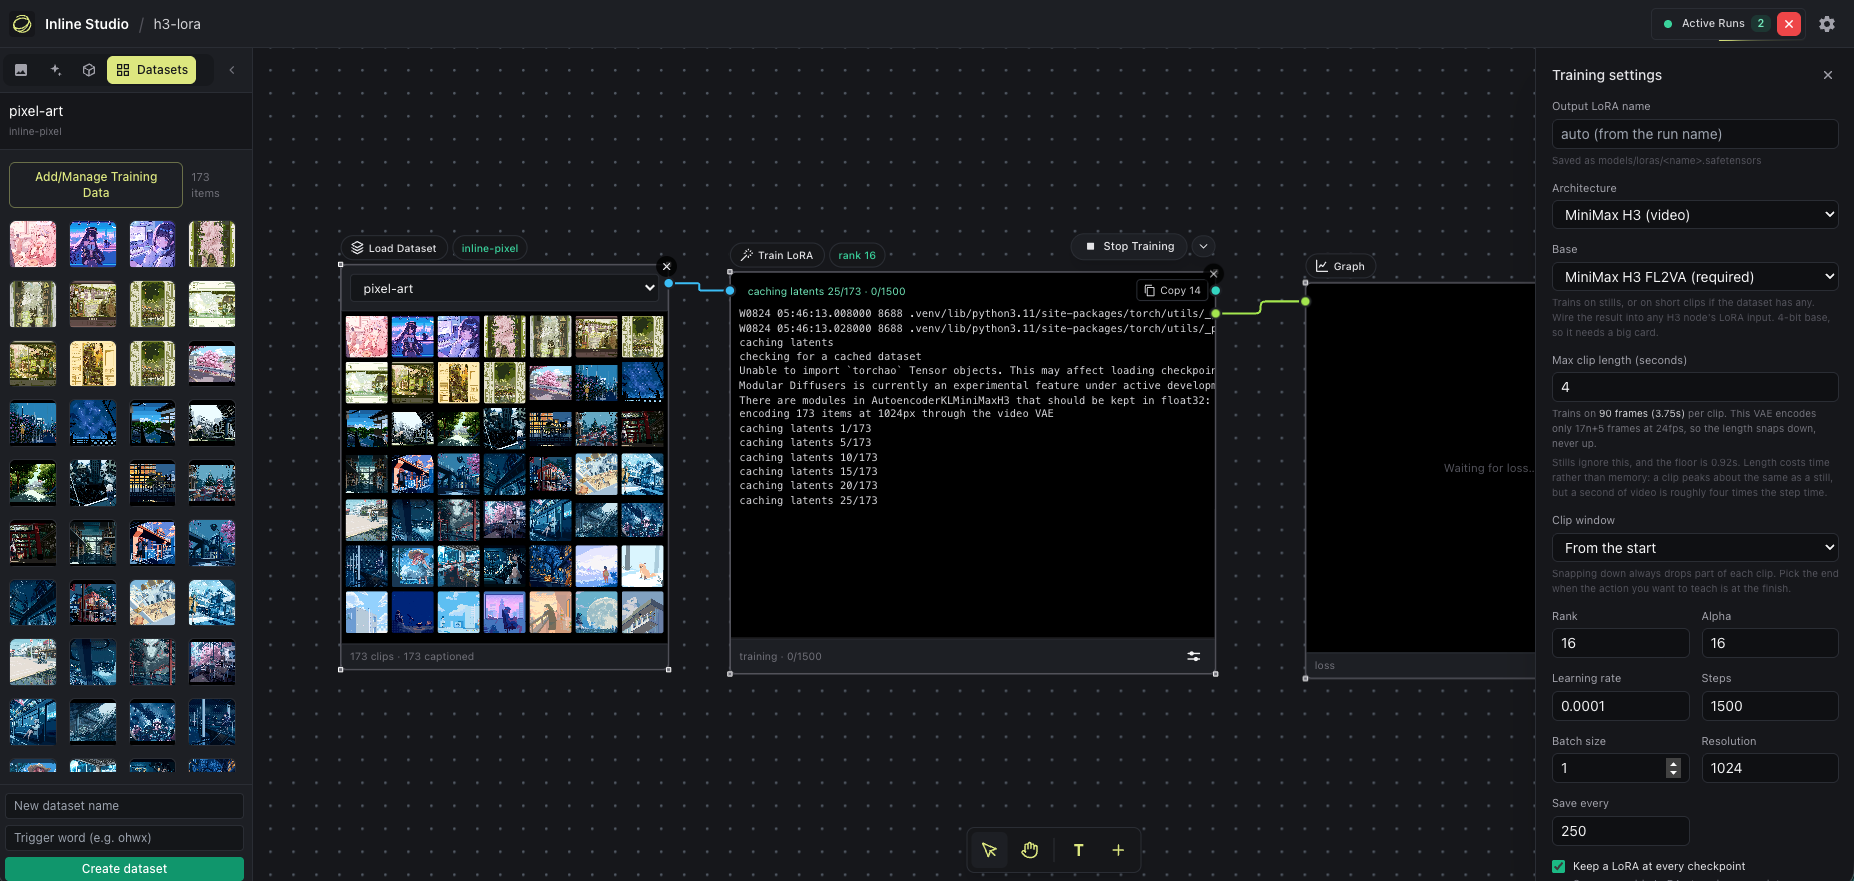
Requirements
- Nvidia GPU: 16GB+ VRAM
- Inline Studio installed
Steps
This is a step by step guide to run this workflow.
Step 1: Setup Inline Studio
- Visit installation instruction on our Github readme to setup Inline Studio on local machine with your own GPU.
- No GPU? Launch Inline Studio via official template on Runpod
Step 2: Download workflow
You can download this workflow from the download icon next to title. Click on it & the json file will be saved to your local machine.
Step 3: Drop the workflow
- Open Inline Studio canvas, create a new project or use an existing project
- Drag & drop the saved workflow into the canvas
Step 4: Install models
As soon as you dropped the workflow, missing model popup will guide you through model download.
Models required:
core/models/
  diffusion_models/  minimax_h3_fl2va_bf16.safetensors        <-- raw bf16 for best quality
  text_encoders/     MiniMax-H3-processor/                    <-- folder
  text_encoders/     MiniMax-H3-text-encoder/                 <-- folder
  vae/               minimax_h3_audio_vae_fp32.safetensors    <-- audio vae
  vae/               minimax_h3_video_vae_fp16.safetensors    <-- video vae
Note: Links are given under model section.
Step 5: Load dataset
On the side panel, do to dataset tab, Create a new dataset by adding a name & trigger word:
Dataset name: pixel-art
Trigger word: inline-pixel
Import dataset from Huggingface
Once empty dataset is created, click Add/Manage Training Data & switch to Huggingface tab & paster repo id trojblue/test-HunyuanVideo-pixelart-videos
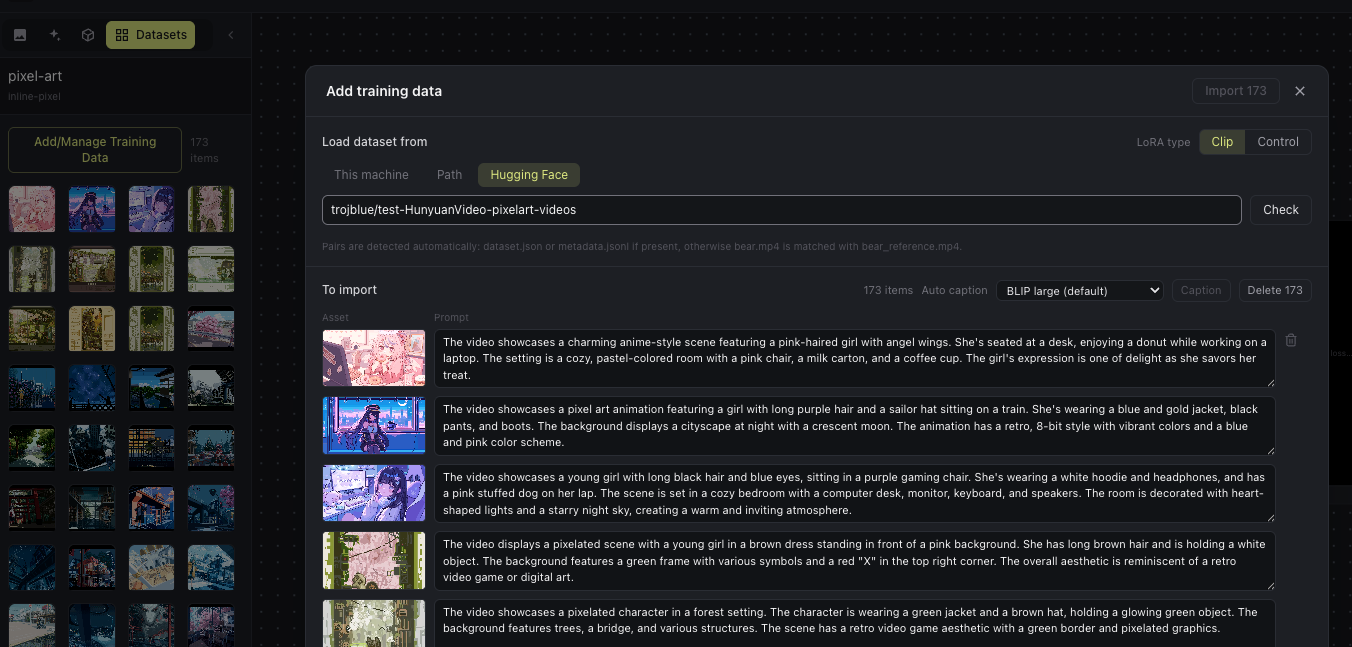
Hit check to verify & then import all to add all clips & captions into your newly created dataset.
Step 6: Training Params
Click on adjust icon on the bottom of Train Lora node.
Important LoRA parameters
| Label | Key | Default | Description |
|---|---|---|---|
| Output LoRA name | outputName | (auto) | Filename for the saved adapter |
| Max clip length (seconds) | clipSeconds | 1 | Ceiling on trained clip length(smaller clips are auto included) |
| Clip window | clipWindow | start | Which end of the clip(set between 1-5s) |
| Steps | steps | 1500 | Total training iterations |
| Resolution | resolution | 1024 | Training pixel size; dominates VRAM |
| Save every | saveEvery | 250 | Checkpoint interval, in steps |
| Keep a LoRA at every checkpoint | saveSnapshots | false | Usable adapter per save point |
Step 7: Start Training
Hit start training after selecting Train lora node & monitor the progress.
Step 8: Monitor Train
You can monitor progress directly via Train Lora node, If you have enabled Save every & Keep a LoRA at every checkpoint, mid training checkpoints will be saved automatically under core/models/loras, you can use them before even the full training finishes.
Step 9: Generated with Lora
If you just want to generate using same generated lora, Setup a new separate generation graph:
Load Lora(Selected your lora) -> Minimax H3 Text to video Generation Node
For any issue or support, reach me out on Discord.